Step 9
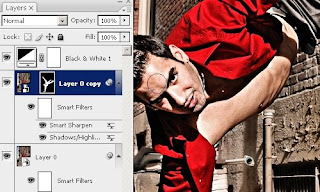
First, press D to reset the foreground and background colors to black and white. Then, select the brush tool and paint in the layer mask over the subject. This can be a person, foreground object, or anything that you want to apply the Smart Sharpen filter effect to. If you want to erase any areas, use the eraser tool. Try to be precise with the painting because any inaccuracies will be visible later when we reuse the layer mask for another adjustment layer.
 Step 10
Hold the Ctrl key and click on the layer mask thumbnail in the Layers palette. This should create a selection based on the layer mask.
 Step 11
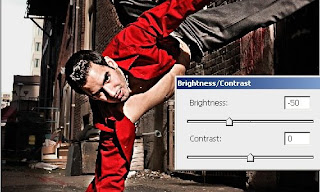
In the Brightness/Contrast settings, set the Brightness to -50 then click OK.
 Final Results
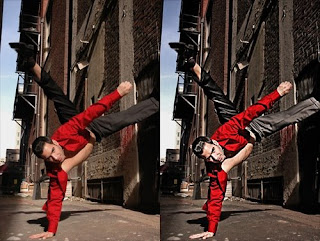
Here's the final results of this photo effect. If you didn't do a good job painting the layer mask earlier, you can use the brush or eraser tools to refine the layer mask.
 Before and after:
100% crop:

 Step 10
Hold the Ctrl key and click on the layer mask thumbnail in the Layers palette. This should create a selection based on the layer mask.
 Step 11
In the Brightness/Contrast settings, set the Brightness to -50 then click OK.
 Final Results
Here's the final results of this photo effect. If you didn't do a good job painting the layer mask earlier, you can use the brush or eraser tools to refine the layer mask.
 Before and after:
100% crop:


0 comments:
Post a Comment